

Welcome to this tiny PICO-8 dev article,
I was missing substack already and I’m quite excited to share my progress towards Monster paradise project! See my previous articles:


I’ve been mostly working at the grid system and well I have to recognize, some tweaks at the art side of the game also happened, just moving pixels around 😁.
My end goal working on PICO-8 is not to create somehow appealing games that I can share, it is basically the journey…To completely dominate the PICO-8 library and be able to prototype or create any small idea that would be triggered on my mind.
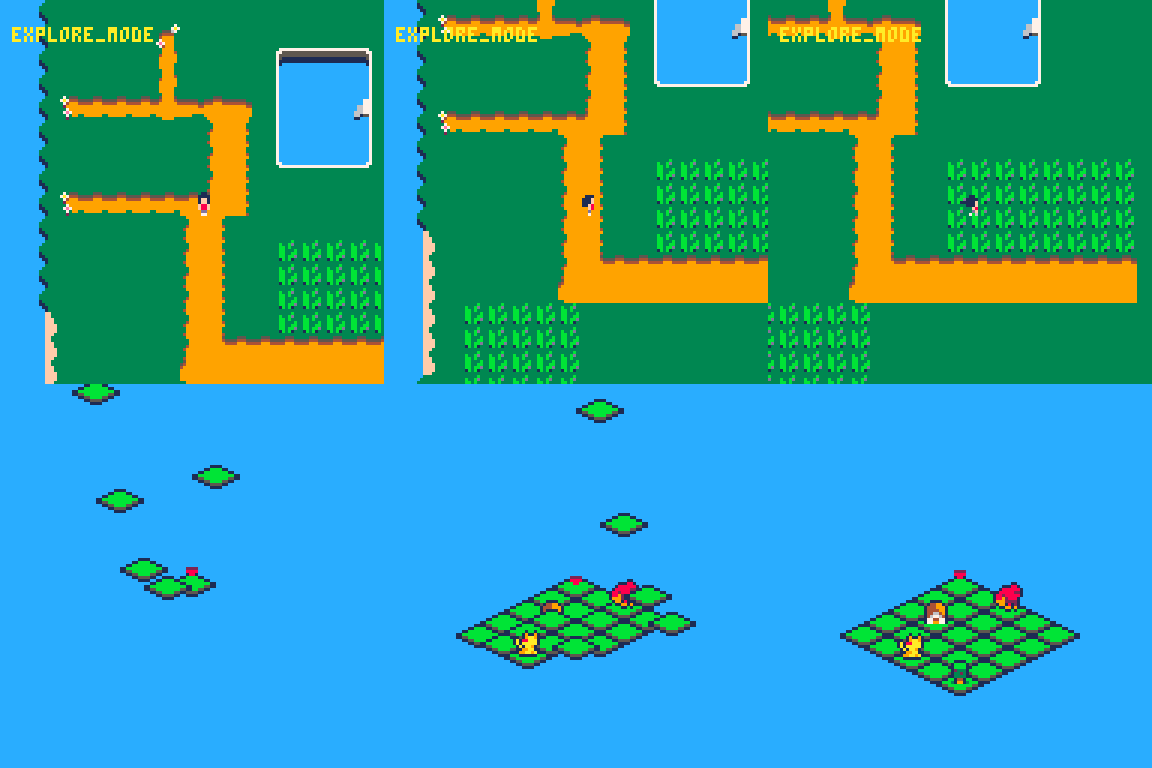
Given said that, without any objective it is quite difficult to stick to a learning and growth process and that’s why I stick to this tiny pokemon-like game, learning in public, so any input from others will (for sure) help me in the process.
Why a Pokemon-like game? Well, because I think I will touch most of the core components of a full videogame.
It is going to be challenging? For sure, has been like that.
Learnings at this article
Understanding the fundamentals of building an isometric engine
Use simple drawing functions to build complex components: A complete grid
Build the pillars for a complete grid turn-based battle system
No AI models has been used at the development process of monster paradise nor this article writing.

Step 1: Just one isometric tile
So following the fact that a line is a connection of points, we apply the same logic here an isometric grid is it’s sum of individual isometric tiles. To start from ground up we are going to define a function inside our PICO-8 editor to draw that tile.
function draw_raw_tile(x,y,c,h)

local tw=16
local th=8

local initx=64+((x*(tw/2)-
y*(tw/2)))
local inity=h+(x*(th/2)+
y*(th/2))

v={
{initx,inity},
{initx-1+tw/2,inity+(th/2)},
{initx,inity+th},
{initx-tw/2,inity+(th/2)}
}

line(v[1][1],v[1][2],v[2][1]+1,v[2][2],c)
line(v[2][1],v[2][2],v[3][1],v[3][2],c)
line(v[3][1],v[3][2],v[4][1],v[4][2],c)
line(v[4][1]-1,v[4][2],v[1][1],v[1][2],c)

end
Calling the previous function will draw just one isometric tile. As parameters you would need:
Parameter X. Will determine position X at the grid
Parameter Y. Will determine position Y at the grid
Parameter C. Colour of the lines to be drawn
Parameter H. The height where the tile will be drawn
As you can see at the code we also defined a table called v (Meaning, vectors!) and it contains the four vectors(X,Y) coordinates we need to draw each joint point of our isometric tile.
local tw=16
local th=8
Having the width twice the height of the tile, we create the isometric projection effect, instead of a top-down view.
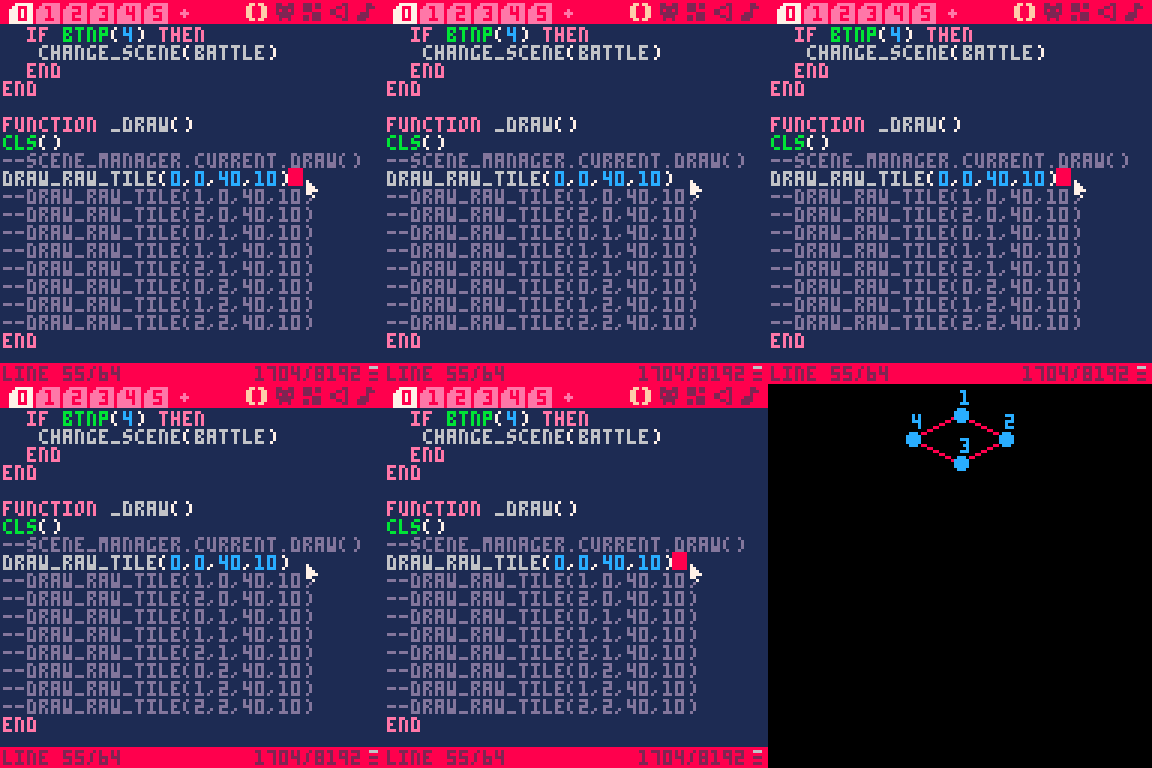
Following clock’s time sorting, we just need to do a quite simple calculation:
First vector: Init X position, Init Y position
Second vector: Init X position + tile_width/2, Init Y position + tile_height/2
Third Vector: Init X position, Init Y position + tile_height
Fourth Vector: Init X - tile_width/2, Init Y + tile_height/2
With those calculations we obtain the coordinates for each of the joint points of the grid.
line(v[1][1],v[1][2],v[2][1]+1,v[2][2],c)
line(v[2][1],v[2][2],v[3][1],v[3][2],c)
line(v[3][1],v[3][2],v[4][1],v[4][2],c)
line(v[4][1]-1,v[4][2],v[1][1],v[1][2],c)
Calling line() for each item at the table will finally draw our intended tile!
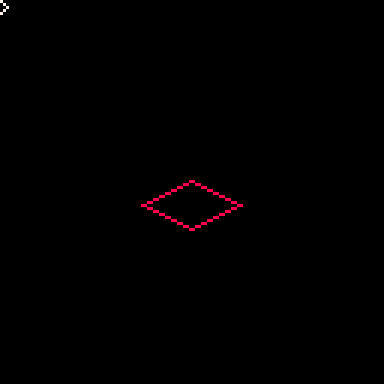
Step 2: Create the Isometric grid
Now, this is the eureka moment, where our previous function start making sense and it’s more useful than ever, oh my lord, can you feel the power of building?
Before excitement cut our flow moment, we need to understand how isometric grid positions works under the most comment pattern for isometric grid levels.
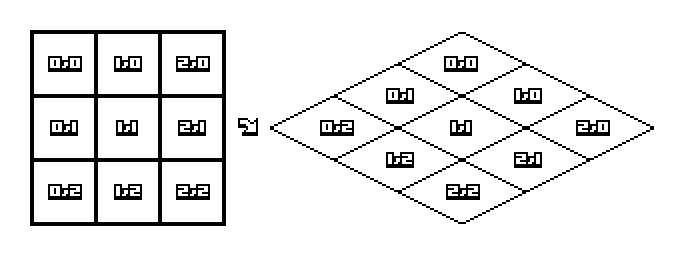
The previous image illustrate the coordinate to spawn tiles based on the X,Y parameters we previously went through at the function draw_raw_tile
Before you jump into the solution. Do you know with the current code so far, how to draw a 3x3 isometric grid? Think about it before you see the code.
Your initial assumption was right, we are going to call our previous function N times, depending on the number of isometric tiles that we want to draw on screen, which at the end determine how big is our battle ground for Monster Paradise.
But how it is supposed to know the exact position to be drawn?
Given the function we built before based on the standard sorting pattern for isometric tiles, you just need to call each of the positions you want to fill.
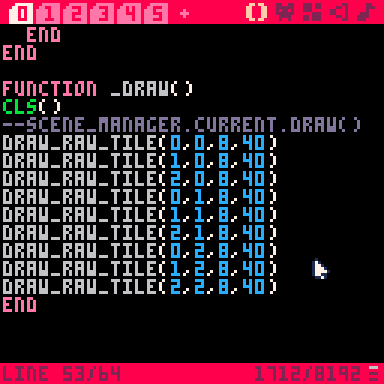
Running the previous code, will actually draw our isometric grid (yay!)
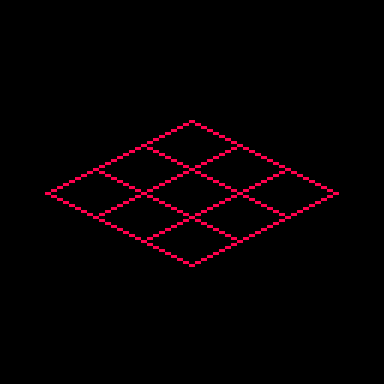
But the interesting part to learn is how tiles are placed at the right slot just providing simple coordinates. Again as most of the time creating prototypes and games, we just need our beloved math for the rescue.
Do you remember our first function called draw_raw_tile()? That one have the logic to place each tile where they belong to.
local initx=64+((x*(tw/2)-
y*(tw/2)))
local inity=h+(x*(th/2)+
y*(th/2))
As you can see at the previous code, we are applying a formula to determine the tile position at the screen based on the creator input (X and Y positions)
What we’ve learnt
PICO-8 LUA, like any other programming language is quite convinient for math and calculations.
Applying some of the most common math functions and theorems, we can obtain impressive and organic results (what a sinergy, right?)
We can now use our tiny isometric engine to create interesting gameplay
I hope this tiny cartridge is useful for you to understand and maybe to lose a little bit the fear in front of PICO-8. I really think there are endless possibilities learning and creating with a limited environment like this before you may jump into any big commercial engine.
Thank you for reading 💌
Having to think through this kind of math makes me happy I chose vibe coding :D